Prototyping the BBC micro:bit
Posted by Michael Sparks on , last updated
We've just unveiled the BBC micro:bit – an entry level, pocket-sized computer that children can program to do all sorts of fun and clever things. It's an awesome project, which I've felt privileged to be involved with during the early phases, helping turn an aspiration into something our partners can bring to life. I've been literally itching to share some insight on that process, how that happened, and a little of what's under the hood.

Like many, I’ve been a strong advocate in getting computational thinking back on the agenda in schools. I'd been periodically assisting BBC Learning for the past few years, so I was delighted to come and work with BBC Learning on this initiative. I moved temporarily from BBC Research & Development, to help those driving it. Working closely with the team, my brief was to create the hardware prototype and software systems that you may have seen revealed by BBC Director-General, Tony Hall, last March. Some colleagues have nicknamed this “blue” since then, so I'll use that name here, though I nickname it “Owl” :-)
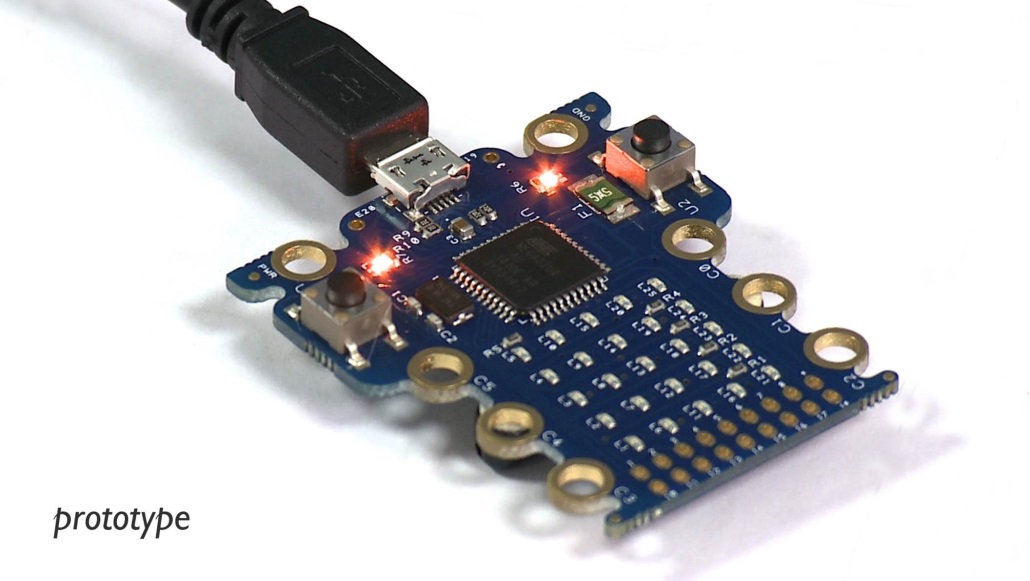 The Blue prototype BBC micro:bit
My colleagues in BBC Learning had been working on the idea since 2012. Part of that was to take a prototype of the prototype of BBC micro:bit to events, testing the waters. They’d seen the high levels of engagement from children and decided to explore what was necessary to scale the concept to a BBC sized audience and fit it into children’s learning environments.
I joined the project in September 2014, before the exact scale had yet to be determined. But we all knew from the outset that to reach an audience large enough to make a difference, getting partners on board would be crucial. We also knew we needed to test the idea in schools, with children and teachers – a different environment from events – where children choose to engage.
That meant the prototype had two main jobs to do: To support day to day usage in schools – with a view to supporting Key Stage 3. To be sufficiently flexible to allow partners to engage, and enable the project to play with their strengths. These two points pretty much required a ground up approach to productisation for reasons I'll touch on below. It had to be delivered in three months for hardware, four for software – a very aggressive timescale, but it was a timescale worth meeting. Simultaneously, specs for potential partners needed to be delivered no later than three months in.
In order to avoid spoiling surprises, we worked in complete secrecy during this time period. After two months' work we had reached a stage where we could spread the technical implementation over more developers, so two of my colleagues from R&D joined me for a month. This enabled me to focus on enabling the prototype to be a complete working system, and also, as importantly, to be sufficiently well documented for potential partners to see precisely what each subsystem involved.
At the time we knew many organisations shared our ambition to get more children into coding and help address the technology skills gap. But we had no idea who, if indeed anyone, would end up working with us to make the BBC Micro:bit happen. That meant the prototype had to be designed with hardware and software systems that were completely open to change, enabling prospective partners to tinker, modify and replace as they saw fit. In practical term this meant starting from scratch from a hardware and software level – since as great as the pre-prototype device was, we couldn't simply adapt the events oriented device the way we needed to.
As an aside, to see 28 partners come together – from some of the biggest technology companies in the world, to start-ups, universities and a range other organisations – is quite remarkable, and humbling. It shows just how critical this issue is to the whole industry.
So, the process I followed was:
- Define the core structure for the hardware, and build a development kit, then iterate.
- Define the core firmware for the device, build around that, then iterate.
- Define the language – visual and textual – that the system would support, build a minimal viable subset and then iterate.
The following picture shows the prototypes developed, from breadboard, through “megabit”, to the “black ones” and followed finally by “blue”. Each device is more sophisticated in manufacturing processes, but actually as capable; changes were driven by software stack needs, with each version becoming more flexible than the last. The main change between the last “black” version and the “blue” version is that “blue” was assembled en masse by machines – all the others were hand assembled (by me!).
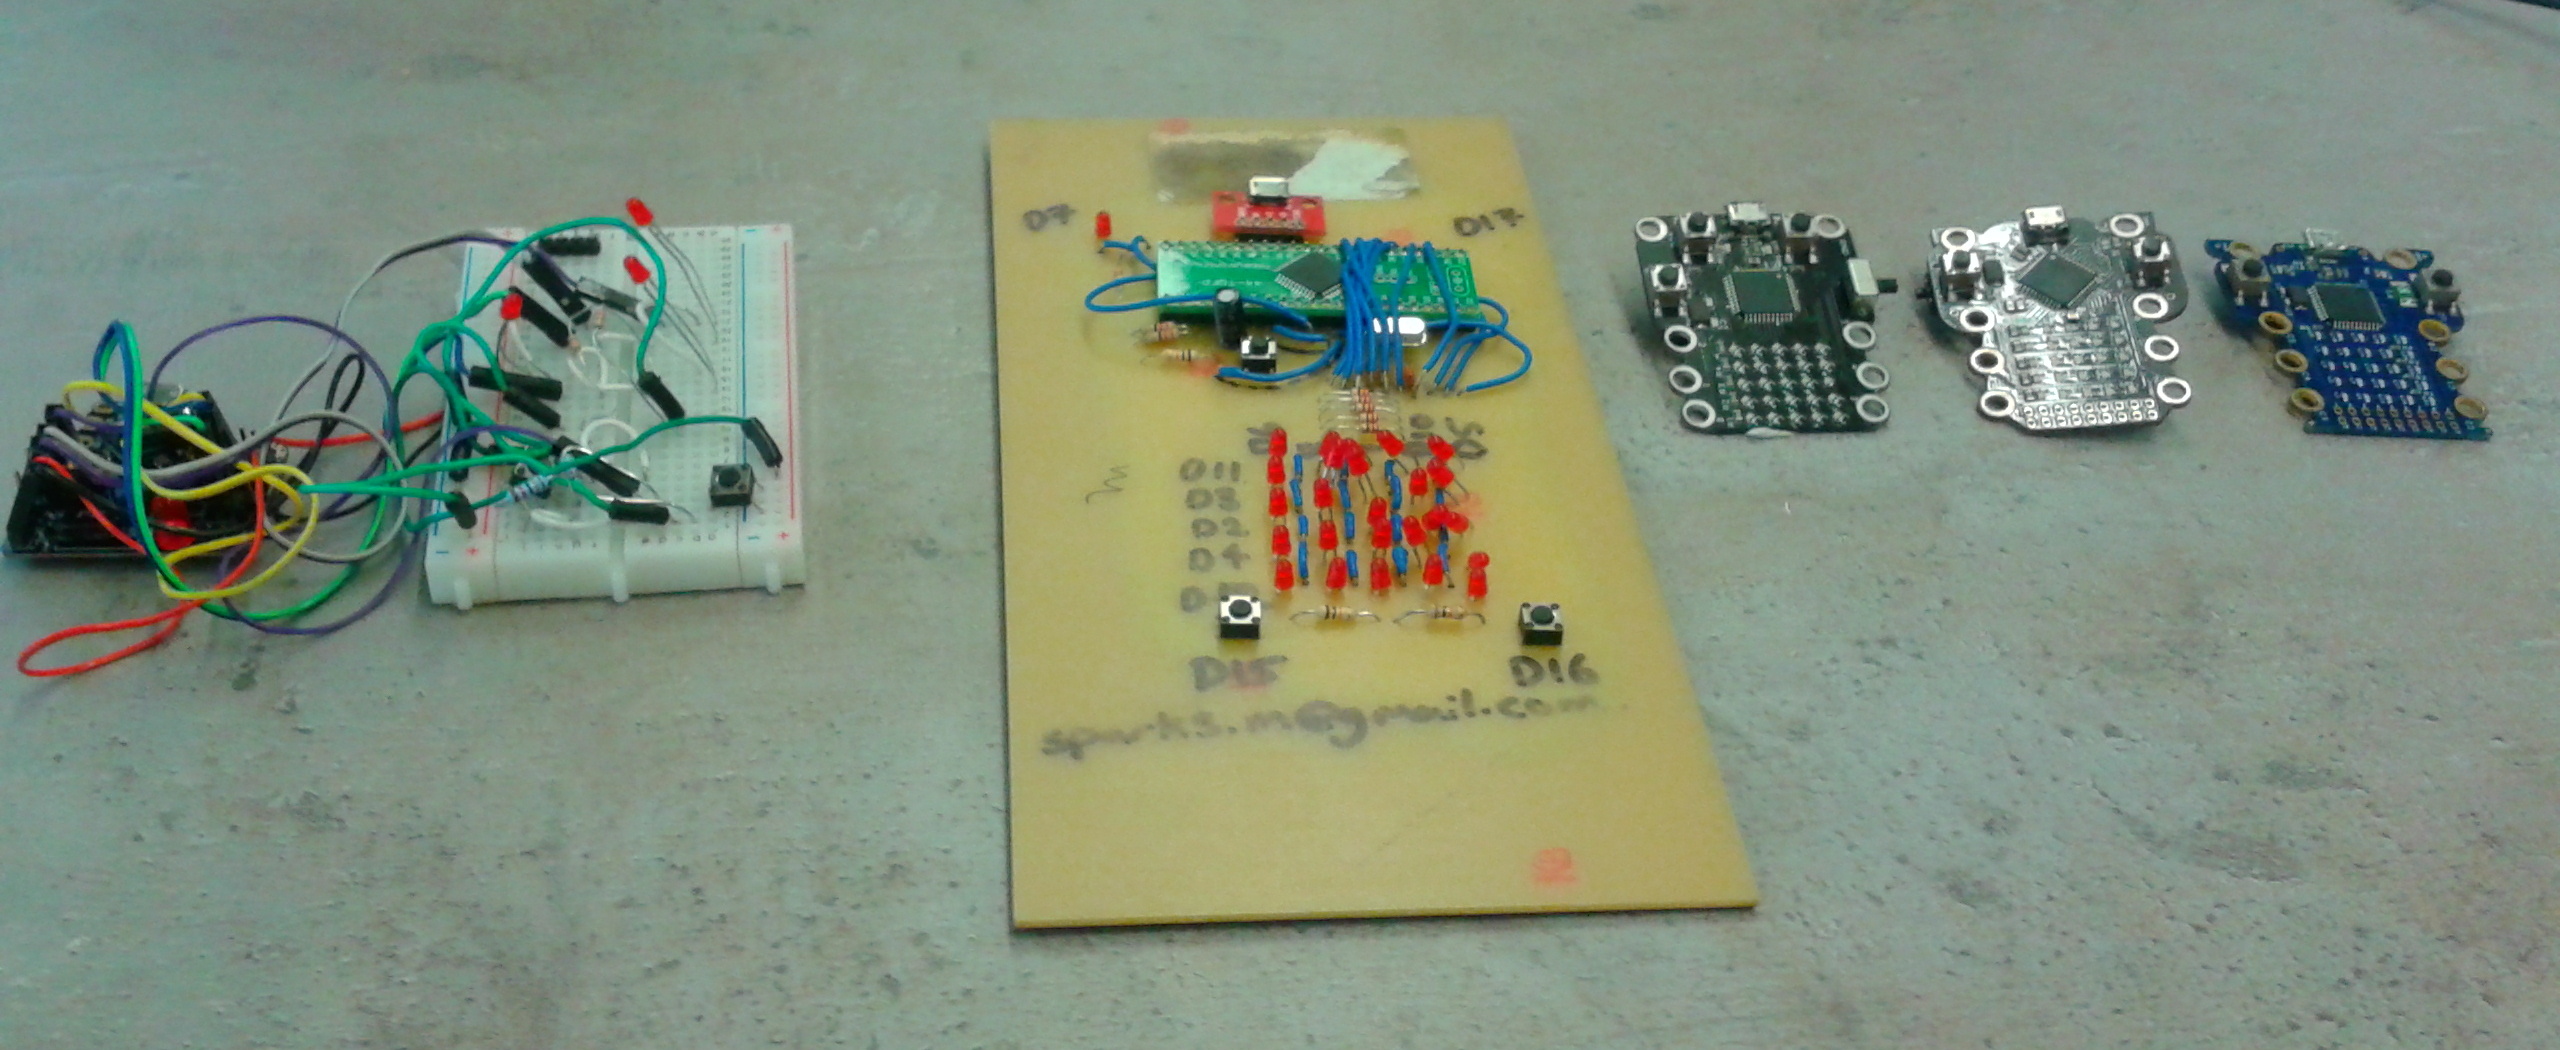 Creating the “Blue” prototype from the ground, up
It should be clear to experienced developers that this process was inherently agile. Every part of the system was iterated over. Rather than a big design up front, there was clear concept, which we would aim towards, but it would be developed in iterations. The development approach was more Kanban/Lean than Scrum. In terms of Kanban that meant rather than fixed two-week development windows, we as a team added things as they arose to the backlog and pulled new tasks through as needed, reprioritising daily based on editorial, pedagogical and technical needs.
Lean itself has its roots in manufacturing, so the way that exhibited itself was as a new device was required, it was assembled on demand. If a black device was needed it took two hours to assemble by hand. If a new PCB was required, that was a one week turnaround for boards and stencils. This approach paid off in terms of flexibility, time and cost – we bought enough components for 10 devices, and converged on a particular design, quicker than we would have otherwise.
Similarly, the firmware stack converged in a similar way. The firmware converged on something I called a “Device Abstraction Layer” or DAL, which essentially took ideas from “nano-kernels” of providing essentially just facilities on the device, but no services. This allows the DAL to be mirrored in a JavaScript simulator, and in the python and C++ interfaces.
The reason we chose python as a language for programming the device was due to its popularity in teaching, not convenience. As a result, the hardest part of the system to create was a specialised python to C++ compiler for the system. However this only needed to support the parts of python the graphical front end language (a scratch-like language) could create, and was targeting a specific environment. Those constraints made what we needed achievable in the time available. Supporting python however would mean other front ends could target python, not the raw hardware.
Lastly, the final part of the system was that the device could be used in a “connected” mode. That is as a peripheral for a host computer – either as a controller, an output, a sensor and so on. Again, this supports key areas of the curriculum, and helps prepare children of today for an Internet of Things oriented world of tomorrow. To support that I used the IOToy framework previously built by R&D, specifically designed for this sort of purpose.
This focus on the jobs the device had to do, coupled with a clear concept to aim towards guiding the hardware and software iterations, and a Kanban/lean agile approach worked fantastically well.
Stepping back, this means that the system was essentially bootstrapped one core area at a time. Initially hardware was explored with Arduino-style boards to see whether what we wanted could be done. The next stage was to test software aspects to flesh out something in each of the software layers, though manually joined together. The next step was to quickly remove the manual join and then to flesh out the functionality in each area.
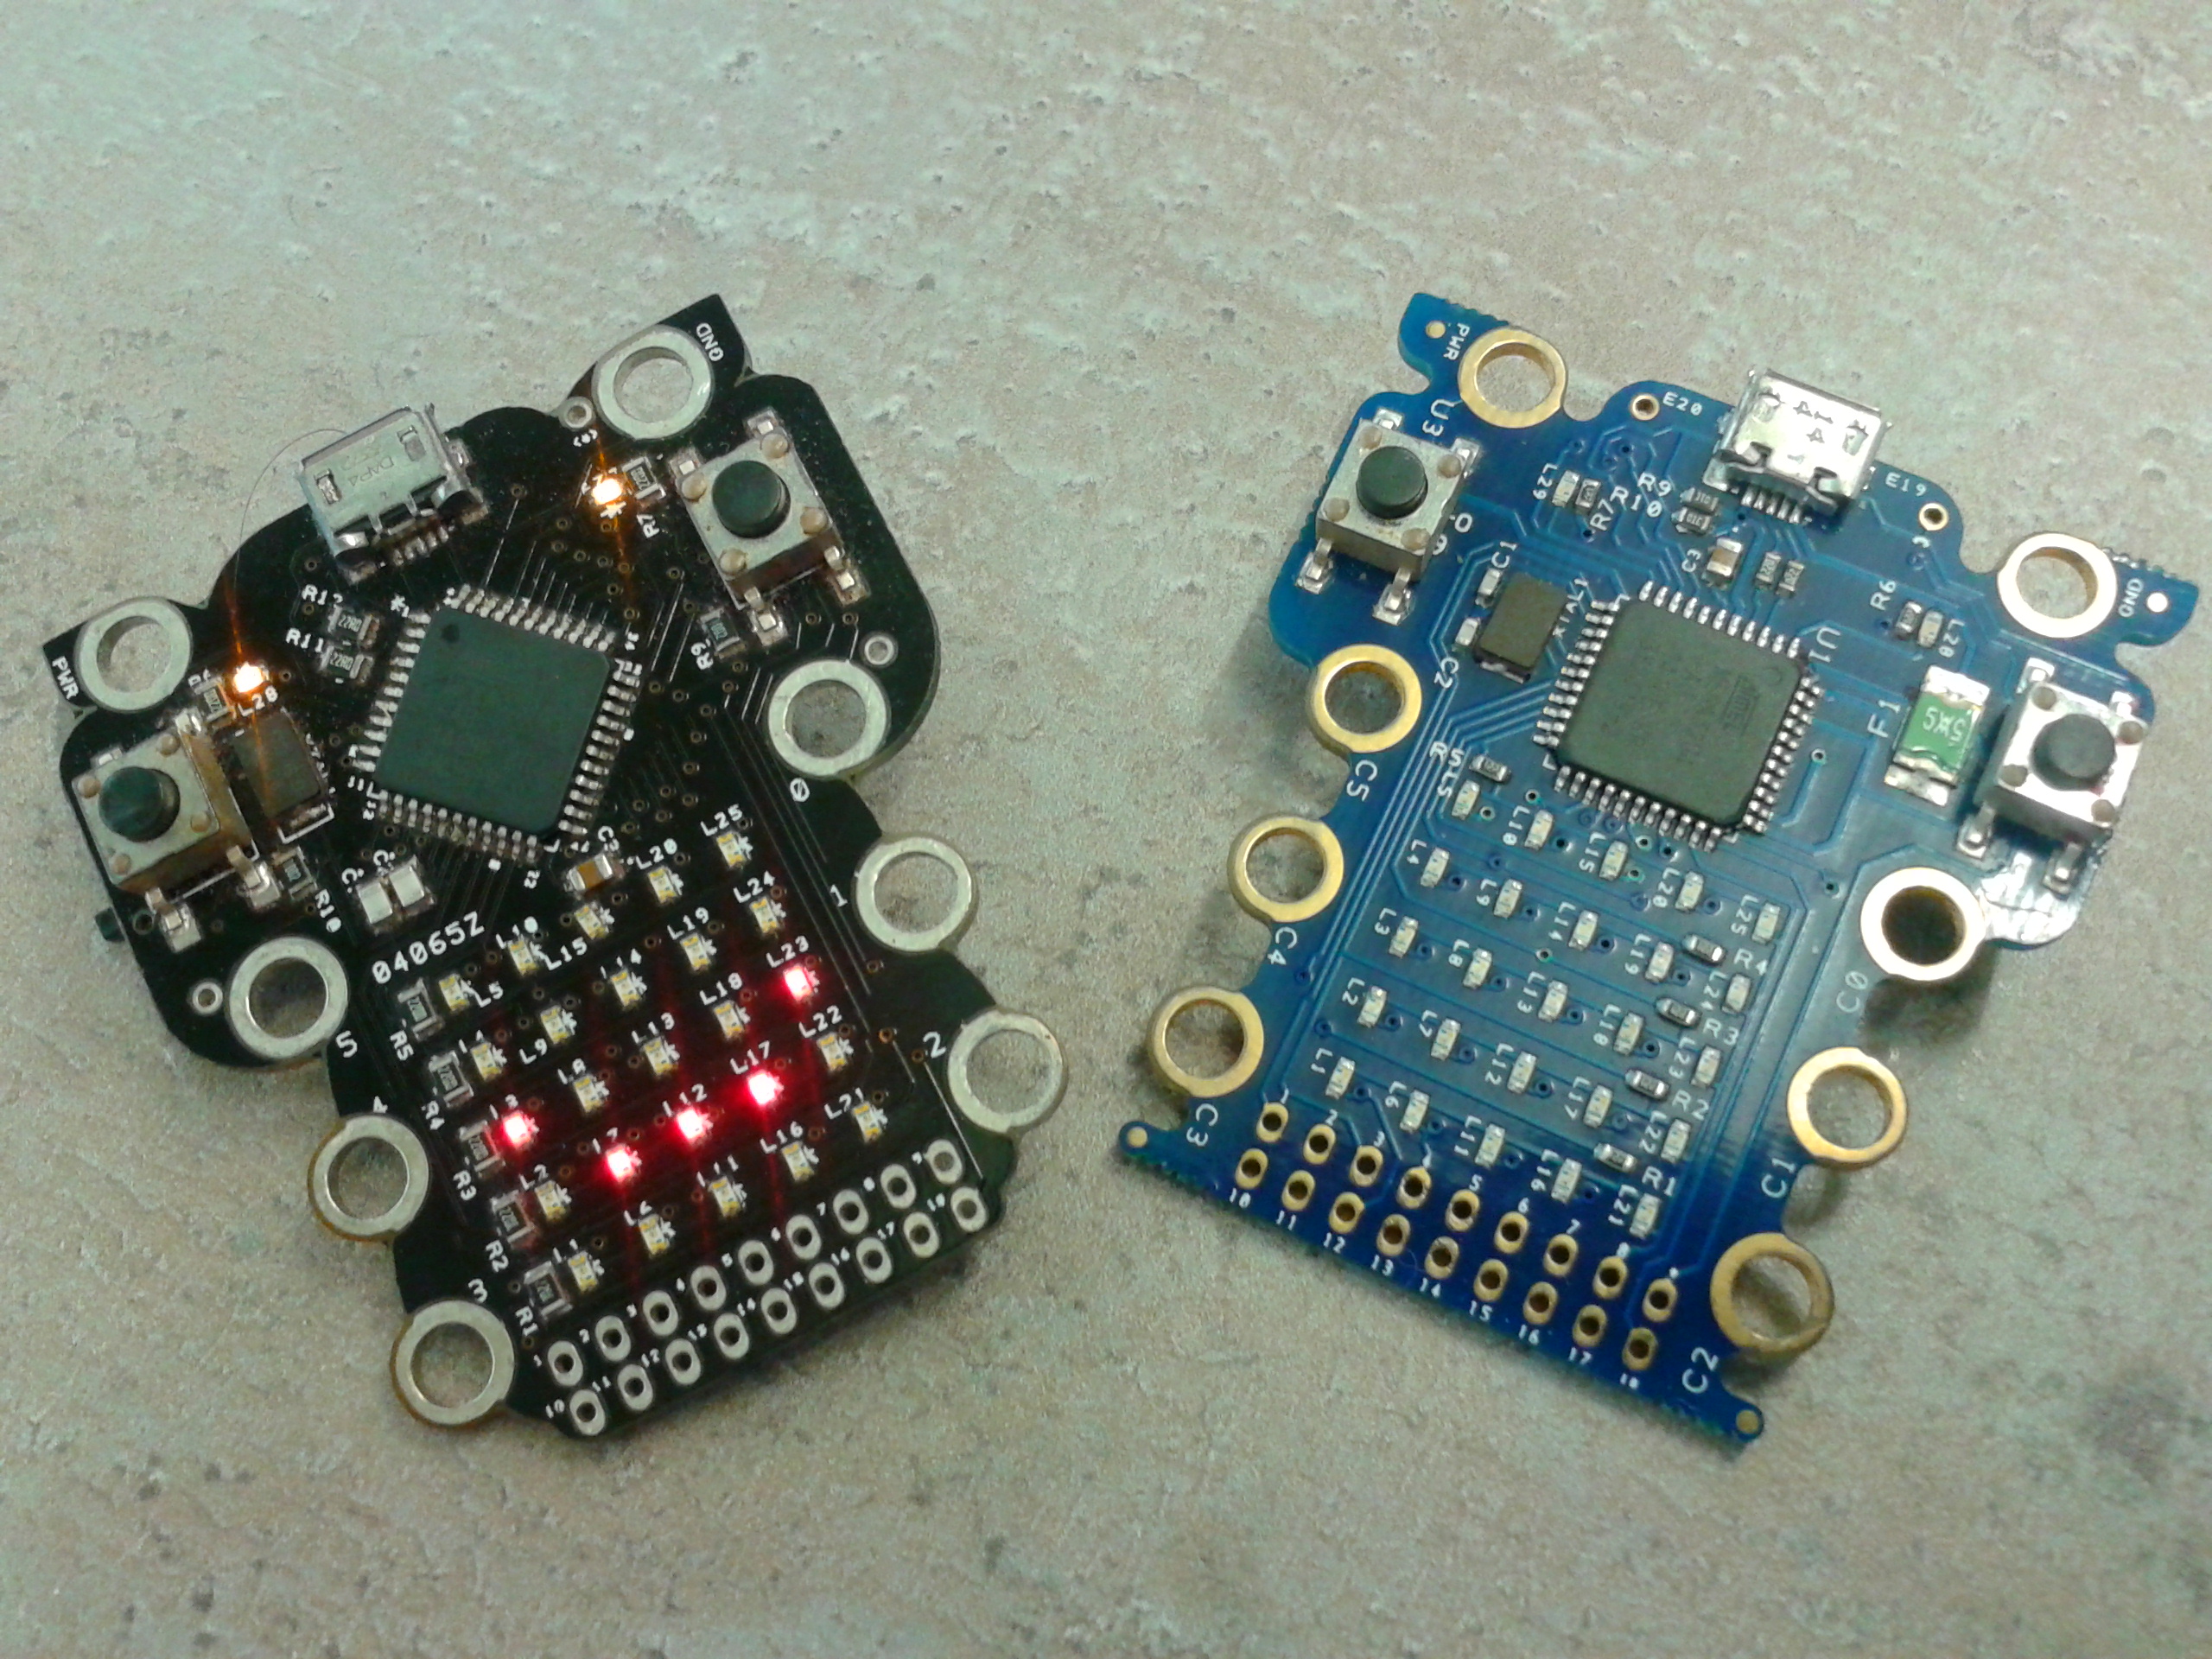 The last manually assembled version, and the final “Blue” prototype
I'll follow up with a more detailed post on the R&D blog soon, but that's the core story of how the prototyping process worked. The speed of development is certainly on the rapid side of the spectrum – to say the least. (It would have been challenging with twice as much time!) However, it gave us a device, firmware, development website, and client side tools we needed. It meant we could go into schools, test it with teachers and pupils, and let them guide where the specification of the final system could do better.
Finally, as noted, the key question the new prototype needed to answer was whether children in the classroom would find the device as engaging as those at the events BBC Learning tested the device at. There’s a big difference between audiences that are opt-in and those that are effectively co-opted. I’m delighted to say – and this will come as no surprise whatsoever given the announcements in March and again today – that the answer was… yes.
We were constantly surprised and delighted by the fun ideas children kept on coming up with throughout the trials. When you see kids getting stuck into it, you can really see what a creative opportunity this is, and how easy it can be to bend technology to your will. I can’t wait to see what they can do with the BBC micro:bit when they arrive en masse later this year.