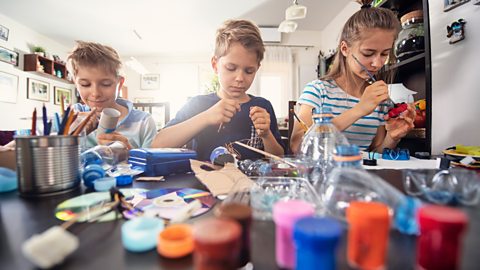
Going for a nature walk as a family can be so much fun. You never know what you might see. From flowers and plants in the park, to different species of trees in the woods, there are so many surprises to discover.
One of the most exciting things you can do while you’re out walking is to look out for materials you can use for art projects. Seeking them out with your children can be a great way of turning an ordinary walk into one that’s extra special.
The great outdoors is filled with treasures like falling leaves, twigs in different shapes and sizes, colourful flowers and seeds. In the summer you’ll spot things that you might not see in the winter, while the autumn looks very different to spring. Whenever you go for a stroll together, take a bag, box or a tray with you so that you can collect up your finds, take them home and use them in your crafts.
Wondering what your kids can make? Share these five arty ideas using natural materials with them and watch their imaginations run wild!

Preparation
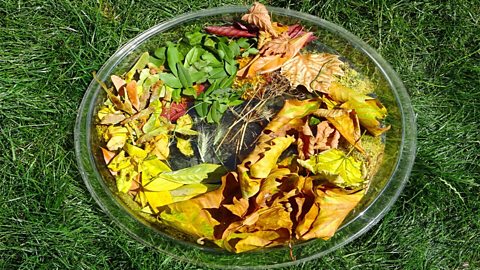 Image source, Momtaz Begum-Hossain
Before you get started sort any treasures you’ve found into piles. This will make it easier to see what you’ve collected.
All the flowers used in these projects were dried first. To do this, place your flowers or petals on a piece of kitchen towel, then cover them with another sheet to make a flower sandwich. Pop your sandwich inside a heavy book, put some more books on top and leave it for two days. Your flowers are then ready to use!
Leaves can be used straight away or you can leave them for a couple of days. They will start to dry out naturally.
1. Lovely leaves
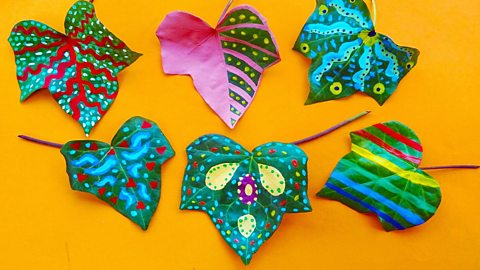 Image source, Momtaz Begum-Hossain
Suits children aged 3-7 year old
You’ll need: paints (poster paints or acrylic paints work best,) paintbrushes, a cloth, and leaves.
It’s time to get creative! In this project all you have to do is use your imagination to paint colourful patterns.
1. Start by wiping your leaves with a cloth. This will make them look tip top and shiny. Then it’s time to get painting!
2. Have a go at making different patterns on your leaves by drawing on stripes, polka dots, swiggles, zigzags, whatever you can think of. Use as much colour as you like.
3. Afterwards your lovely leaves will have lots of uses. Why not stick them over a plain picture frame, or even on your wall to create a special background that you can take photos in front of?
2. Fashion cards
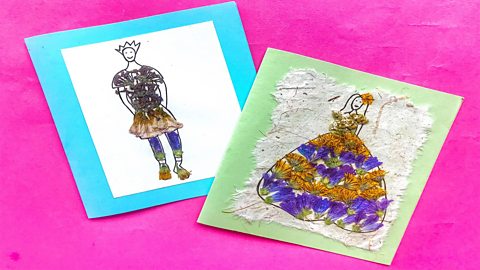 Image source, Momtaz Begum-Hossain
Suits children aged 5-7 years old.You’ll need: card, paper, safety scissors, ruler, pen, glue (a stick or white/PVA glue), and dried flowers
Have you ever wondered what it’s like being a fashion designer? If so, then why not try designing your own clothes made from dried flowers? Your designs will also look very effective on greeting cards that you can send to friends and family to say hello.
1. Fold your card in half to create the card size you want. This one measures 15cm by 15cm.
2. Cut out a rectangle of paper that is a bit smaller than your card and stick it on the front. Use safety scissors or have an adult do this.
3. With a pen draw a picture of a fashion model on the paper in an outfit you’d like them to wear.
4. Instead of colouring it in, stick on dried flowers. It looks very effective just like the different textures you get in fabric.
5. Why not send the finished card to a friend or family member in the post? Before you do, place an extra piece of card inside the envelope, on top, to protect the delicate design.
Top tip
If you or your child find it tricky to draw a fashion model then don’t worry, there’s lots of inspiration online to help you. Have a search for ‘fashion silhouettes'. Historical fashion is great because you’ll find clothes like big dresses or baggy trousers that give you more surface area for decorating. Roman and Victorian fashion silhouettes are a fun place to start, or perhaps something you could see in a shop like a sari, wedding dress or football kit.
3. Fantasy tree art
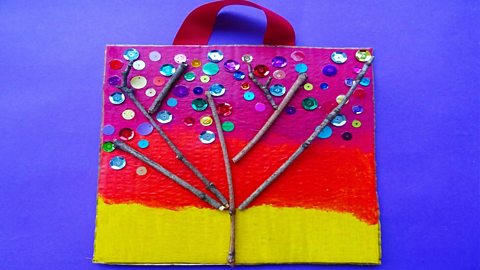 Image source, Momtaz Begum-Hossain
Suits children aged 7-11 years old.
*You’ll need: twigs, a cardboard box, paint, paintbrushes, sticky tape, white/PVA glue, safety scissors, ruler, pencil, and decorations for the leaves - you could use sequins, buttons, stickers or even cut out small leaves from coloured paper – see what you have at home.
Make some sparkly artwork for your bedroom!
1. First you’ll need to make a canvas. From a cardboard box, cut out a square that is 20cm by 20cm, using your pencil and ruler to measure it out. Use safety scissors or have an adult do this.
2. Paint the cardboard and leave it to dry. You could do a sunny blue sky or use pretty sunset colours.
3. When the paint is dry arrange your twigs so they look like a tree. Glue them in place.
4. Next stick on your decorations to look like leaves. For this fantasy, tree sequins were used, but you can decorate your tree however you like!
4. Regal collar
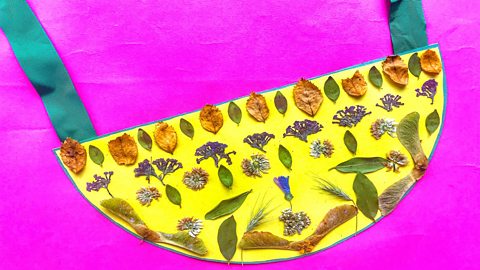 Image source, Momtaz Begum-Hossain
Suits children aged 5-11 years old.
You’ll need: coloured card, ribbon, safety scissors, pencil, dinner plate, glue stick or white/PVA glue, assorted leaves and dried flowers.
Make a fashionable jewellery piece inspired by the extravagant collars worn in ancient Egypt. Pharaohs and queens loved wearing big collars around their neck. Your children might have seen images of them at school as Egyptians are studied as part of Key Stage 2 (7-11 year olds). In this project they’ll have a chance to make their own collar from jewels and gems found in nature.
1. Create the collar shape by drawing around a dinner plate on some card.
2. Cut out the circle. (Use safety scissors or have an adult do this for younger children) Fold it in half and cut through the middle to create two semi-circles.
3. Take one of the semi circles and stick two pieces of ribbon at the top along the edge. Glue the other semi circle on top. Your ribbon will be sandwiched in-between and your two circles will be stuck together.
4. It’s now time to decorate with your treasures. Lay them out to create your design then glue them in place.
5. Tie the two ribbon ends together around your neck to wear the collar.
Top tip
If you have gold card at home use it as your collar base. It will add extra sparkle and make your jewellery look even more regal.
5. Nature notebook
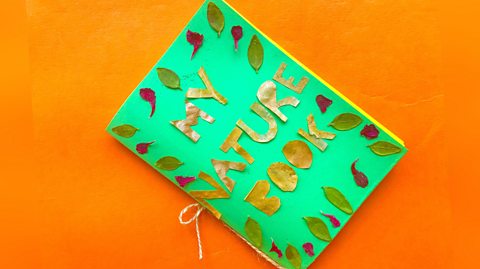 Image source, MOMTAZ BEGUM-HOSSAIN
Suits children aged 7-11 years old.
You’ll need: A4 paper in two colours (this is printer paper size), pen, safety scissors, glue stick or white/PVA glue, string, and leaves.
Jot down your favourite discoveries when you’re out walking, or use this special notebook to sketch what you see.
1. Fold one piece of paper in half and cut it down the middle. Use safety scissors or have an adult do this. Take one of those pieces and fold it in half. This will be the front and back covers of your book.
2. To make the pages do the same again using paper in a different colour. So fold your paper in half, cut it and it fold again. Do this until you have five pieces of paper folded in half.
3. Open them out and lay them on top of each other.
4. Sit the pages inside the cover. Cut a piece of string. Lay it through the middle of the notebook. Bring it around to the outside and tie into a bow.
5. Draw letters on your leaves spelling out the words ‘my nature book'.
6. Cut out the letters and stick them on the front. You can also add some extra leaves and flowers to create a border.
For this project, A4 paper was folded in half to make a small notebook but you can use larger size paper to make a bigger notebook if you prefer.
Top tips for nature collecting…
 Image source, Momtaz Begum-Hossain
Before you go for a walk together have a chat about things to remember when collecting nature materials.
1. Don’t pick anything from someone’s garden without getting their permission first.
2. Don't pick bluebells as it is against the law. Never uproot a plant as it is illegal - for more information look at this guide to picking wildflowers and the law. If you’d like to pick flowers or leaves make sure there are still lots of others left after you’ve taken yours.
3. Look out for any plants with nettles – no one likes getting stung. And be sure to check this guide from the Woodland Trust about poisonous plants like foxgloves, deadly nightshade and poison hemlock!
4. Keep an eye out for spiders, as you don’t want to break up their beautiful webs.
5. A good place to look for materials is the floor. It’s definitely where you’ll find lots of twigs! Children can wear gloves to pick them up but it’s best to use dry ones rather than collecting them when they’re muddy after a rainy day.
6. On the grass you’ll find dandelions, daisies and other wildflowers. These are great for pressing and using in different projects.
7. If you go into the countryside to collect, remember to follow the Countryside Code.
Finally, encourage children to collect things that they like. Once they start using natural materials in their art projects they’ll soon discover that it’s very exciting, as you never know what materials you’ll find next.
Happy nature crafting!
Words & images by colour and crafts expert Momtaz Begum-Hossain.
Parents' Toolkit
Fun activities, real-life stories, wellbeing support and loads of helpful advice - we're here for you and your child.

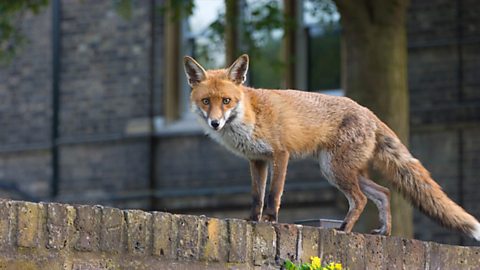
Learn how to track local wildlife with your family
It doesn't matter if you live in a city or the countryside, there is always wildlife to discover. You just have to know which signs and tracks to look for.
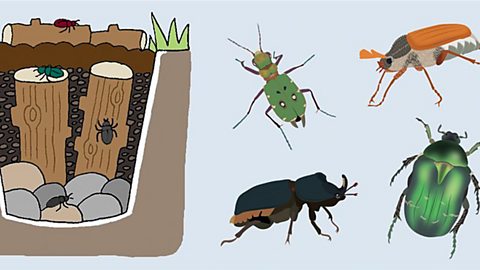
Build a beetle bucket for your garden
Try this outdoor activity with your child or teenager to help them learn about the kinds of insects and ecosystems that exist all around you.
Up-cycling at home: ideas to get crafty with your kids
Crafty ideas for turning everyday objects, destined for the recycling bin, into fun activities for kids at home.